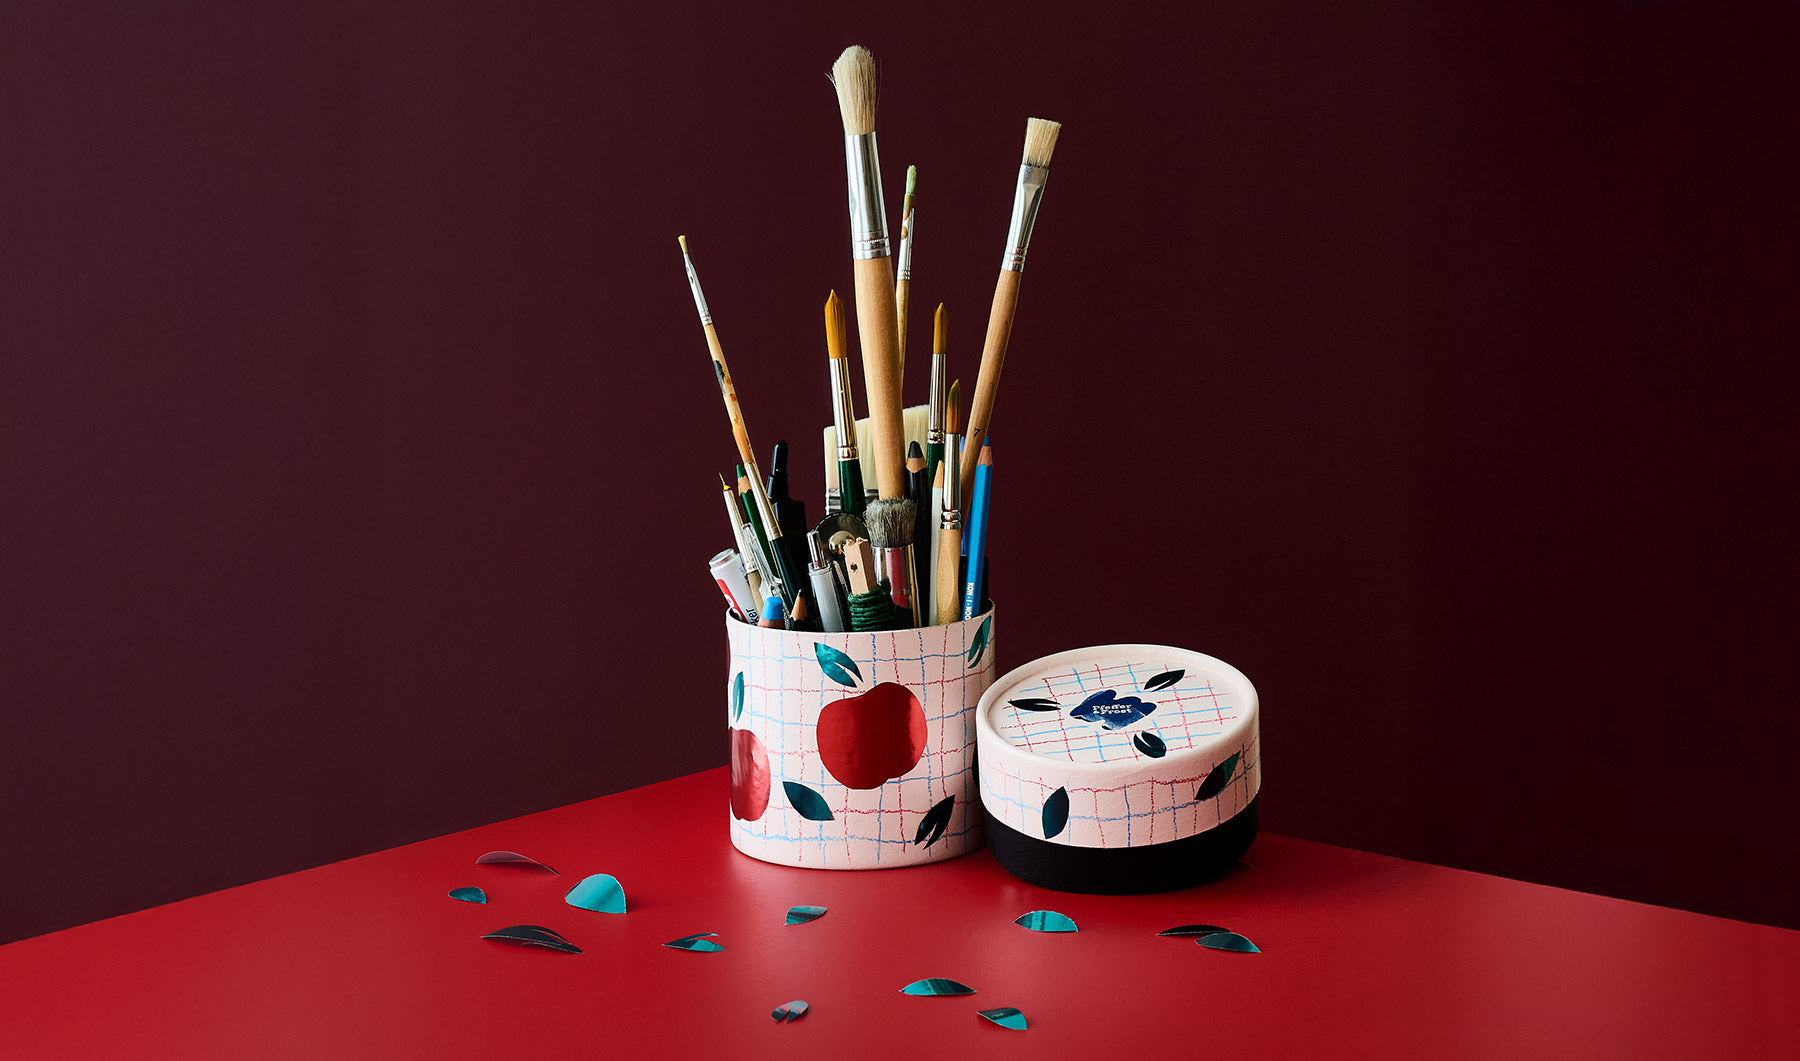
How to plant an orchard without getting up from the table (craft instructions)
Summer is slowly coming to its end, but the apple-picking season is just beginning. Red, yellow, and green varieties will be rolling across our checkered tablecloth.
And with the printable template, you can build an entire apple orchard on your craft tin.
Material list - what you need:
- white finger paint
- wax crayons e.g. red and blue
- transparent craft glue
- a good pair of craft scissors
- apple Orchard template
- red and green glitter paper
- pencil for embossing
How to make an apple orchard:
Step 1 – Paint the tin
Use white finger paint to paint the outside of the lid and base of the tin. Let it dry thoroughly.
Step 2 – in the meantime: let's cut some apples
Print the "Apple Orchard" template set on plain copy paper. Cut out the apples and leaves, leaving a border, approx. one finger's width.
Place the apple and leaf shapes on the glitter foil and secure them with a few strips of masking tape to keep them in place while you work. Now, using a pencil and a little pressure, trace the lines so they're imprinted on the glitter foil.
Snip-snip! Cut out all the pieces of your apple orchard individually with scissors. Once you have all the pieces together, set them aside.
Step 3 – Decorate the tablecloth
Is your white paint dry already? If so, draw a vertical line down the top edge of the tin with your blue crayon, then draw a vertical line next to it with your red crayon, and then alternate until you've gone all the way around the tin. Then, again, draw alternating blue and red horizontal lines to create a checkered pattern.
Step 4 – now it’s time to glue!
Take your craft glue and coat the first piece of paper with it (right up to the edges).
Now work one by one: Glue your apples, one by one, onto your tablecloth in a colorful pattern. And don't forget the leaves.
One more thing:
Covering with paper or stickers? No problem. If you paint the tin, please be careful which paints you use. Paints often contain solvents or other substances that can soak into the craft tin over time. In this case, it is better not to store biscuits, cookies and the like in it. Of course, you can store pens, craft materials and similar items in the painted tin without any problems. Play safe ✌️Done!
Show me your crafty apple paradise on Instagram! If you tag @pfefferundfrost , I can share your work with the whole crafting gang.